Although much has transpired with our makeover project, it has been a while since our last post - mostly because of me starting back to school this week. The time has been limited as I have been trying to get back into the swing of things. So, get cozy for a lengthy post to catch you up!
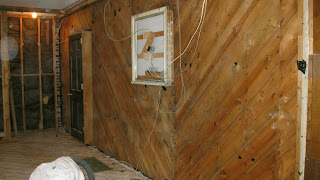
Last weekend we took down all the wood paneling, pulled out the built-in bookcases, and removed all the trim. We also removed all the wood plantation shutters and plan to put them up on craigslist.com if you know of anyone who needs some wood shutters.
This project was definitely time consuming and took some strength! Kevin tackled the built-in bookcases, while I started on the walls. First thing I learned - start at the bottom and work up. First I took off all the shoe molding, then I removed all the baseboards and took all the trim off around the windows and the doors. Kevin also took off all the crown molding, which we plan to save, paint and reuse because it is in good condition. That was definitely a job for the contractor of the family because once my pieces came off, they weren't really in saving and reusing condition. Once, all those pieces were removed, it was time to pull off the wood paneling!
There I am with my crow bar pulling down all the paneling. See how far I have gotten! Check out that pile of trash behind me. For the most part, all of the wood came down very easily. Look how much brighter it is in there already.
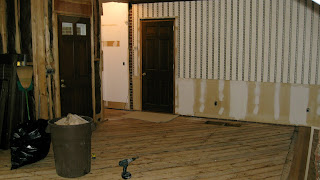
Once all the paneling was down, it was time to pull out the framing for the closet and remove some of the framing where the wall was built out for the bookcases. The framing around the closet proved to be a little too much for me - power tools were needed. So, Kevin tore that out.
See how that wall juts out past the corner? That little section needed to be pulled out. So, we hammered away on it until it broke loose.
Next, remember how we pulled up the carpet to find partical board, not plywood, well, all the partical board had to be pulled up, which apparently was quite a task. Each board did not easily pull up,but instead, disintegrated. Let that be a lesson that you should not use partical board under your floors - very bad idea. The funny thing is that the partical board is more expensive than the plywood at Home Depot. The only thing I can think is that they thought it is more expensive therefore it must be better.
So, we are down to the studs and the original subfloors. You will notice that we still need to take the drywall off that one wall, but other than that, we are ready for the next step of the process, which involves bringing in the professionals who can do our HVAC and plumbing.
The airconditioning guy came yesterday morning to work out a plan for the placement of the air ducts, and we measured out all the rooms to make sure everything worked out in the actual room. I know there were a lot of pictures, but we accomplished a lot. This week we plan to take down the dry wall and cut holes in the floor where the airconditioning can go.


 After only about an hour, we had all the carpet and the padding pulled up and in trash bags, and it seems like this whole renovation thing isn't that hard.
 The weather this weekend was great, and it seemed a shame to spend the entire weekend indoors tearing down walls, so we set out on a hunt to find a piece of furniture that we could repurpose as a double vanity for our bathroom. After stopping by a friend's house for some inspiration (she recently finished a very large and beautiful restoration, so we thought we might steal some ideas), we headed to some local antique shops to see what we could find. We went from Cleveland to Commerce to Jefferson to Gainesville to eBay, and decided that we really liked the first piece we saw. It was perfect - the right price, the right style, and even after adding two sinks will still have plenty of storage. And considering it was so much cheaper than anything we saw all day, we knew we should probably act fast. So, today, we drove back up to Cleveland to purchase it, and here it sits in our garage waiting to be installed. For some reason, the lady who was selling it, didn't bring the drawers with her, so she dropped them off today (after we bought it). We felt like we had been to Cleveland our fair share this weekend, so we decided we'd go back another day to pick up the drawers. We are so excited about this piece, and think it will work perfectly in our new bathroom!
  Stay tuned as the walls (ugly wood paneling) come down...


